Blog, Destinations, Kiddos Without Carry-ons

Kid-friendly Outdoor Adventures in Northwest Washington

We’re getting outside these days more than ever. Despite the changing seasons (and accompanying Pacific Northwest rain), outdoor adventures are good for our souls. Our exhausted, anxiety-ridden, eight-months-into-a-pandemic souls. With masks and hand sanitizer in tow, we’ve been heading out to lots of local parks and trails. I always consult the AllTrails App and the Washington Trails Association App for current trail conditions before departing. Here are my favorites in and around Bellingham: 

Larrabee State Park 

This park features beautiful views of Samish Bay and the San Juan Islands and there’s just a short hike down to a pebble beach (a favorite picnic spot of ours).  It is the perfect spot for exploring tide pools. 

Camping is available. It’s a state park so you’ll need the Discover Pass or a one day pass (automated machines available in the parking lot). 

Clayton Beach

This beach is technically a part of Larrabee, but you must access it via its own trail. There is a parking lot on Chuckanut Drive across from Fragrance Lake Road (and the sign for the trail is across the street from the parking lot). There is one steep rock scramble near the end of the trail as you get close to the beach; little ones will need a hand to hold! This is another great beach for exploring tide pools, and the hike down to the beach is an adventure of its own. 

Lummi Island

Bordering the San Juan Islands is Lummi Island, a small, bucolic island west of Bellingham. It’s a quiet paradise until we arrive with our kids – then it’s a louder paradise. Biking the island is a great adventure if you have a bike trailer or your kids are old enough to ride independently. A small, open-air car ferry will take you there, but we leave our car behind and just walk on with our bikes and kids in tow. You can do a lovely seven mile loop from the ferry dock, which is a quick and easy way to see the beauty of the island. There are lots of animals to stop and see, there is a public beach accessible behind the Congregational Church (as well as at the ferry dock), and during the summer and early fall nearly the entire island is covered in wild blackberries. 

The ferry leaves via Gooseberry Point on the Lummi Indian Reservation, only takes about six minutes, and is fun for the kids (especially if you’re used to traveling on the massive Washington State Ferries).  

Semiahmoo Spit (Semiahmoo Park)

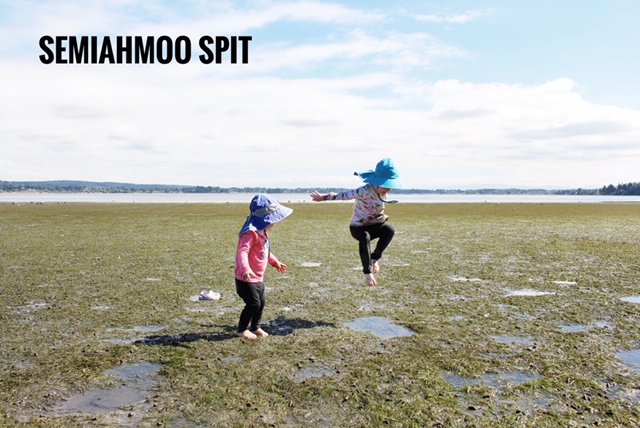
There is a paved walking path (stroller friendly) with beautiful views on each side (0.8 miles one way). We usually just let the kids play at the beach during low tide. There are views of Mount Baker and the Twin Sisters, there are several picnic tables, and you’re guaranteed to see lots of birds, especially during the winter. 

Hovander Homestead Park

350 acres of paradise for children: farm animals, a playground, river access, and there’s even a Children’s Story Garden. The kids love the Tennant Lake Marsh Boardwalk (1.4 mile loop)- just make sure to hold the hands of wiley toddlers. 

Boulevard Park and Taylor Dock

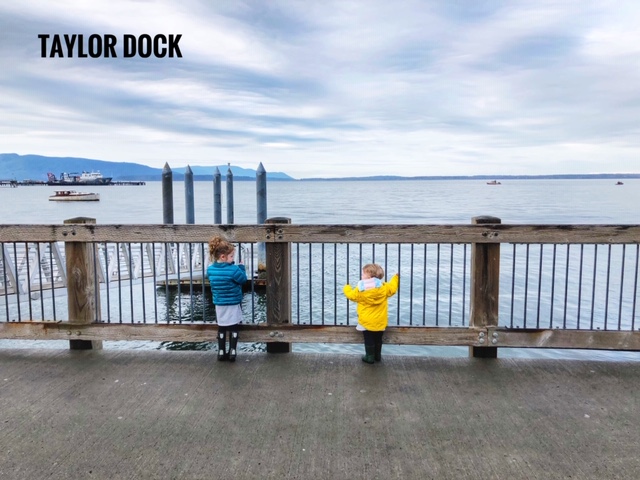
Located along Bellingham Bay in Fairhaven, this is a wonderful park for kids. Picnic tables, a playground, and a rocky beach perfect for little kids. Woods Coffee is located within the park and they have a to-go window near the playground. The park connects to Taylor Dock, an elevated boardwalk over the bay that connects the park to downtown Fairhaven. 

Lake Whatcom Park

Some of my favorite hikes with kids are located in this park:

Chanterelle Trail– It’s only 4.8 miles but is basically straight up hill… so it’s a great workout, especially if you hike up the Wickersham Truck Road instead, which we’ve been doing recently to avoid the possibility of any crowds. The view at the top is worth it. 

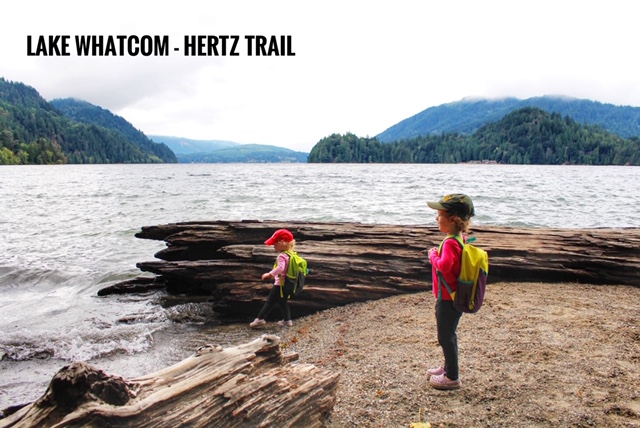
Hertz Trail– This trail is flat and has so much to see that your toddler will forget that she’s hungry, tired, and forgot all her dollhouse toys at home, etc. You’ll pass by streams, a waterfall, and a few pieces of beach that are swimmable during the warmer months! The trail is wide and stroller friendly, and it’s perfect for social distancing. (6 miles out and back).

Deception Pass State Park

This park is a bit of a trek from Bellingham, but it’s worth the drive. There is much to love about this park: 35 miles of hiking trails, the Puget Sound shoreline, access to three lakes, and the views of the San Juan Islands. There are options for boating, camping, fishing, and swimming, and there are many good spots for whale and seal watching. 

The park is located on two islands– Fidalgo to the north and Whidbey to the south. Discover Pass required, or there are automated pay stations in the parking lots.

Pin it for later!
Blog, Travel Tips

Getting There is Half the Fun: How to Road Trip With Kids

Guest Post by Peggy Windsor Halliday aka My Mom! She wrote this in 1992 and it absolutely holds up today.

The key to successful travel with children is realizing that it requires hard work but that the rewards are tremendous. Traveling together is one of the most important things you can do as a family. Shared experiences are among the best gifts that you, as a parent, can give your children. But there is a lot more to it than throwing the kids in the car and driving away. Good planning and realistic expectations make the difference between a successful trip and one you would rather forget. 

Why is Family Travel Important?

These are the days of “living in the fast lane”. Parents and children alike are busier today than they have ever been– busy for the most part with activities that don’t intersect the lives of other members of their families. Many families share a home but little else. Even meals together are rare. 

Family vacations draw us together through mutual experiences in an atmosphere removed from the distractions of work, school, daycare, friends, and housework. The family is responsible only to itself and for itself. Family vacations build the traditions and memories that bond us together for the rest of our lives. 

Car travel throws us together in such a way that we have no choice but to be together, in a place where we must rely upon ourselves and each other for our entertainment. While this may actually discourage some of us from planning long car trips, it should be looked upon as an inducement.

Busy parents who have little time during the course of a normal day to simply sit and play with their children can really benefit from the “idle” hours spent in the car. At home it is a luxury for parents to be able to give their undivided attention to their children for more than a few minutes at one time. Even in the middle of a family activity it is difficult not to jump up to check on dinner or answer the phone. In the car, parents are their children’s captive audience. For the parents it can be a delightful opportunity to teach, to play, to listen, and to learn more about their children and their special, unique ideas.

Expectations

We have all heard horror stories about family vacations which left the parents on the brink of divorce and offering to give the children away to anyone foolish enough to take them. The usual cause for such disappointment is unrealistic expectations. 

Most people have so little vacation time that it is natural to want every minute of it to be perfect. They expect the children to be well behaved and to appreciate everything they have planned for them, and they expect to return home feeling rested and relaxed. 

Be realistic. There is no need to romanticize car travel, but neither is there reason to dread it. Don’t expect the children to be interested in everything that you are. Don’t expect to finish that nine hundred page book you started when you were expecting your first child eight years ago. Realize that the children will fuss and argue some of the time but there are things you can do to minimize this and help them have a good time. 

It is not uncommon for the beginning of a long trip to be a bit rocky, and it helps if you expect this. The start of a trip is a period of mass unwinding, a time for each family member to settle into the changes in routine and find a niche in which he is comfortable. Older children, accustomed to being passively entertained by television, suddenly find themselves responsible for their own amusement. Initially they may intensify their quarreling with siblings, then surprise you by calling a truce for the duration of the trip. Boredom and restlessness produce an anxiety which often leads to great creativity. One creative idea which frequently emerges is that it is better to play together than alone. And together there is no end to the games and activities your children may invent.

Getting Psyched

Try to get everyone in the family excited and involved in the planning. Present older children with maps and guidebooks and ask them to research places of interest along the way. They may enjoy planning where to stop for the night. If you intend to stay at a motel, give the kids a travel guidebook you trust and let them circle places that meet your guidelines. If you are camping the same can be done with a campground guide. 

Children of all ages like familiarity. They will be more comfortable with the idea of being away from home if the places you are going have been a topic of family study and discussion. Show them drawings and photographs of the places you will visit. If you will be seeing friends or relatives tell them as much as you can about these people and show them any photos you may have. Even if you have seen them fairly recently, keep in mind that young children have short memories. 

Take advantage of the public library. Look for story books or chapter books that take place where you are traveling. There are also many videos available which will help familiarize even preschoolers with a wide variety of places.

Before you leave lay out a map which covers the entire route and have your family trace it with a pencil. Each day or when your trip is complete the children can color the line with a marker. Each time your children add a line to the map they will be very proud of the new territory they have covered.

Packing

Everyone has his own method of packing and entire books have been written on the subject. The three best tips for family car trips are:

1. Don’t use suitcases. Instead, pack in colored duffle bags which are soft and flexible and will fit almost anywhere- under feet or smashed into corners. Even the smallest member of the family should have his own bag. With a different color for everyone you know at a glance whose is whose. When you arrive at your daily destination each child can grab his own.

2. Have each child pack a minimal amount of toys in his own backpack and keep the backpack beside him in the car. Backpacks should be no more than half full (more about this later).

3. Always pack a Front Seat Bag, which is kept within reach of a parent. This bag may be a large paper sack, or a beach bag works well, too. Fill it with solutions to potential problems which may arise, things your children might need RIGHT NOW. A Front Seat Bag could contain band-aids, wet wipes, visors and sunglasses, crackers and fruit snacks, small flashlights, CDs (humor, children’s, foreign language, Broadway musicals), books, a jug of water and cups with lids, and baby bottles. Packing the Front Seat Bag requires some forethought about what your children might require to keep them happy. It is worth every minute of effort you put into it. 

On the Road

Finally the time has come and you are on your way. What are some tricks to keep things running smoothly?

Use bribes, not threats. Okay, call it positive reinforcement, if it makes you feel better. This is where those half empty backpacks begin to fill up. Don’t tell the kids the horrible things you will do to them if they misbehave; tell them that if they are cooperative they will get a surprise every 100 miles (or 50, or 200, depending upon your pocketbook and your children’s ability to delay gratification). 

Keep a sack of wrapped presents in the Front Seat Bag, or beside it. Wrapping the surprises is worth the extra mess. You might want to give out the first round of presents as you leave town to ease everyone through that rocky start. Surprises may be as simple as a pack of lifesavers or a box of raisins or some baseball cards, or they may be toys to add to the backpacks, such as washable markers and a notebook (a good first present), a sticker book, sewing cards, a maze or puzzle book, an action figure, or a magic paint book. A ratio of two or three snack treats to every toy treat helps keep down the cost. 

Rotate seats, including adults if you have more than one driver. Everyone needs a change of scene after a couple of hours in the car. If you have put an older child to work entertaining very young ones, be sensitive to what hard work it can be to sit next to a baby or toddler. Adults may want to take their turn in the back seat as well.

Make rest stops interesting and productive. Never feel pressured to stick to a schedule; after all, you are on vacation. Get off the interstate and find a park or a school with a playground where the kids can be physically active for twenty minutes or so. Twenty minutes may not sound like much but it is longer than the standard school recess. If you can’t find a playground any large grassy areas will do or a quick game of catch or tag or follow the leader. You may even stumble upon a local fair or parade. If the weather is bad look for a fast food restaurant with an indoor or covered play area. Letting the kids expend some of their energy seems to make all the difference in how well they travel and get along with one another. 

Don’t forget to let babies out of car seats while the car is stopped, even if they are not protesting. Babies need exercise, too.

Try to work in as many scenic detours as you can. If your children did research ahead of time they will appreciate you taking the time to follow some of their recommendations. This is the part of travel that will serve to broaden their experiences, and possibly yours, too. 

Games make car travel a breeze. Here are just a few suggestions for children of various ages. 

3-6 Months: “Grab-it Bag”: Fill a small drawstring bag with items of various shapes, sizes, colors, and textures, such as a small bean bag, a soft hair brush, a rattle, and a string of wooden spools. An adult or older child can use these objects to play a number of games with the infant, such as tug of war or peek-a-boo as you hide them and find them. Save this bag to use only in the car and keep your eyes out for interesting items to add to it. 

6-12 Months: “Bag of Animals”: Fill a drawstring bag with plastic animals, the ones too big to swallow. Have a baby pull them out one at a time, and ask her, “What is it?” and “What does the _____ say?” Show her the sounds and she will be repeating them before you arrive at Grandma’s house.

1-2 Year Olds: Toddlers need frequent, brief stops and lots of toys and games. “Simon Says”, Colorforms (which stick on windows), washable markers and coloring books are popular. Picture books, small cars and trucks, purses filled with safe odds and ends, and music will hold a toddler’s attention for a time. When all else fails you might have an older sibling or parent “sing a story”. These made up adventures can go on indefinitely and become so outrageous and amusing you’ll have everyone in the car wanting to take a turn at being the singer. 

3, 4, and 5 Year Olds: Once children reach three years old it becomes much easier for the driver to participate in entertainment because the children love to experiment with language. Car travel is an ideal time for memorization. Practice anything you have been working to teach your child, such as his full name, address, telephone number. Practice counting, saying the alphabet, rhymes or opposites. Try memorizing short poems. 

6 and Up: Mazes, books, writing or drawing in journals, and coloring are perfect for independent play. Favorite group games and the ages they work with are:

“Quizzes” (age three and older): Mom or Dad asks each child a question in turn on any academic subject appropriate to her abilities. One point is given for each correct answer. Sample questions might be (for a five year old), “Who was the first president of the United States?” or (for a ten year old), “Name three oceans.” Children love this game, especially if it is a close contest, and it is the parent’s job to make sure that it always is. 

“How Well Do You Know Me?” (age five and up): This is a great game because it gives you sometimes surprising insights into your children’s personalities. One person is asked a question about himself, such as, “Who is your favorite sports figure?” or “What was your favorite birthday?” Everyone has a chance to guess his answer before he tells what he really would have said. 

“Travel Bingo” is a great game for readers. Before the trip, make a list of thirty or forty things you might see along the highway, such as a windmill, a New York license plate, a “men working” sign, and so on. Make enough copies for everyone. Pass them out in the car and see who can check off everything first. 

“Stump the Driver” (age nine and up): All you need for this game is a paperback dictionary and some paper and pens. One person selects a word from the dictionary that no one can define. He writes the definition on a piece of paper, changing the words just a little. Everyone else makes up his own definition and writes it down, then all players pass theirs papers to the one who selected the word. He reads all the definitions aloud. The driver must decide which is the real one. This game is fun for the children and helps keep the driver alert. [Editor’s Note: There’s a board game similar to this, called “Balderdash”.]

The list of enjoyable car games could go on and on. If you draw a blank just ask other families for suggestions. People love sharing their own favorites.

Car travel can be the perfect opportunity to encourage your children to become more imaginative and creative, to increase their attention spans, and to become responsible, with your help and encouragement, for chasing any boredom. So, if you’re going on a trip, leave your impatience at home. And remember, getting there really can be half the fun!

Blog, Travel Tips

Checklist for Flying with an Infant

Infants are some of the easiest travel companions– seriously! Some babies are more fussy than others, but compared to crawlers and walkers, infants are a whole lot easier to manage on flights IMHO. They don’t need snacks or Daniel Tiger, they sleep a lot, and they stay in one place. Aside from some necessary documentation, all infants really need for a flight is to be fed, clean, and warm.

Before having kids I would often pack for trips at the last moment— now, I start packing days in advance to alleviate any last-minute stress before leaving for airport (…for more about handy gear to pack, click here).

Here’s a quick checklist to help prepare before your first (or 30th) flight with a little one:

Birth Certificate. The rules are different for each airline but it’s always a good idea to have it on hand just in case. (Even for older babies/toddlers it’s a good idea to have ID on hand because many airlines require proof that the baby is under two for “lap child” status, even when it’s obvious).

Passport (if flying internationally). Apply well in advance (at least two months unless you want to pay extra to expedite). Baby passport photos are one of my favorite things.

Global Entry Card (if you use that service). While babies can piggyback on their parents’ TSA precheck, they must have their own Global Entry card to use the service when flying internationally. Babies must go through the interview process, which is kind of hilarious. It took longer to process and receive our baby’s card because she wasn’t able to be fingerprinted (too squirmy).

Proper Clothes. At least two extra outfits for baby plus a change of clothes for yourself. I suggest footie pajamas to keep baby warm on plane and so that you don’t have to worry about losing tiny socks. My two month old had a diaper blow-out in the first hour of a fourteen hour flight, so… changes of clothes are a necessity for both you and baby.

Blanket. We use lightweight muslin swaddles (like these ones by Aden and Anais– they’re not cheap but after being used by two babies and having countless washes they look brand new) to keep baby warm on flights, clean up spit up, and as a nursing cover.

Breastmilk or Formula (plus accompanying bottles and nipples). For more on feeding baby in flight, click here.

Diapers, wipes, and changing pad. You know your baby best and about how many diapers you’ll need, but pack for worst case scenario (i.e. stuck on tarmac for hours and then a missed connecting flight).

Hand Sanitizer (wipes or mini bottles) for yourself and to rub down your seat tray (most bacteria-ridden spot on plane) because baby’s immune system is immature.

Medicines in a ziploc bag. We pack Benadryl, Ibuprofen, and Tylenol. Don’t forget a measuring syringe. TSA will likely open the medicine to check it.

Pacifier and clips (and extras!) if your baby likes them. These are good for relieving ear pressure on take-off and landing, although nursing or drinking from bottle has same effect. We use pacifier clips so they don’t get lost/drop on dirty ground.

Plastic bag for dirty clothes or dirty diapers.

Sling or soft carrier for travel through the airport. I use a Boba, Solly or Wildbird Sling but they are all pretty comparable. This allows you to have two hands free to carry luggage, present your boarding pass and ID, etc. It also often keeps baby snuggly and calm/asleep.

On some long domestic flights and international flights you’re able to request a seat assignment with a bassinet for your infant (with a surcharge of course). We haven’t had the opportunity to do this, but think it would be a game changer on long flights.

If you’re flying with more than one “lap child” we think it’s worth choosing two seats that are across the aisle from one another. We do this for two reasons: a) some planes don’t have enough face masks to accomodate more than one baby in each row and therefore don’t allow two lap children in one row and b) this gives you a better chance of having at least one open seat next to you.

Okay parents with infants, what have I missed?

Pin it for later!
Blog, Travel Tips

Milks on a Plane

Bad title, important topic. No matter whether you nurse, pump, or formula feed your baby, figuring out how to do it in the air can be intimidating. Just writing this post is bringing back negative feelings from when my first child was an infant and I tried to figure out the logistics of feeding her on a twenty hour journey.

I nursed, pumped, and bottle fed baby #1, so I now have a good grasp of how to do each of these on planes (but would love advice from others– comment below!)  I feel like the larger discussion around this topic, the better for all of us. Below is my break-down for how to feed your baby en route and at the airport, as well as the best way to acquire cow’s milk at the airport for your older baby/toddler:

En Route

Nursing

Duh, if your baby nurses well you are obviously going to want to nurse her per usual. I just completed a fourteen hour flight with my two month old and she easily nursed like normal throughout the flight. It’s hands down the easiest way to go if you can manage/are comfortable nursing in public. Just think of all those bottles you don’t have to pack and sanitize! If you don’t feel comfortable nursing in public this is tricky because airplane bathrooms are not conducive to nursing and there’s virtually nowhere else to go that’s private. If you want the most privacy, opt for a window seat. I’ve found that a soft baby carrier (Moby, Solly, Boba, K’tan, etc.) thrown over you can provide more privacy and I always travel with my baby in a carrier through the airport anyway. Remember, even people against breastfeeding in public (who are these monsters?!) should be glad you’re attempting to keep your baby quiet and calm along the journey.

Pumping

This is more complicated but totally doable on the plane, if need be. Know your rights. Pumps are considered a medical device and should not count against your carry on allowance. Some airlines require you to flag a medical device 48 hours before your trip– check with your specific airline. If you need to pump on the plane, I’d also check with your airline about the availability of a power outlet at your seat.

I imagine that pumping would be extremely difficult if you were not flying with a partner to hold the baby while you pump. My only suggestion would be to buy your baby a seat (and bring the car seat on board) so that you could manage the space to pump. Pumps can be cumbersome and I opted to use a manual pump on the plane so I didn’t have to worry about cords, the noise, etc. But do keep in mind that planes are loud once they’re up in the air so even the noisiest pumps probably wouldn’t be very noticeable. There are also pumps that are verrrrrry quiet. The Spectra is almost silent compared to the Medela Pump-in-Style which is relatively loud. If you’re going to need to pump several times over the course of a long haul flight, portable pump cleaners are a way to sanitize the pump parts between sessions. I have these ones, and they’ve worked well. You can also buy “Pump and Save” bags so that you don’t need to worry about packing and sanitizing extra bottles. Also keep in mind that flight attendants are there to help you, so you could always ask the attendant for help making this work (perhaps space in the galley could be curtained off).

*My advice is focused on traveling with kids but I also want to note that you don’t need to travel with a baby to travel with your pump or breast milk.

**If you’re traveling abroad, make sure your pump will work with the voltage at your destination or will work with a travel adapter. Or bring a battery operated pump.

Bottle Feeding

In order to bottle feed baby on a long flight, you’ll need to make sure to bring enough sanitized bottles and nipples to last the entire journey plus a few extras in case of delays. Same goes for breast milk or formula: pack more than necessary for your journey. There is really nothing worse than being hours from your destination knowing that you’re completely out of milk. TSA liquid regulations don’t apply to formula or breastmilk. In order to avoid a hectic situation in a long security line, I would recommend flagging down a TSA agent while you’re in line in order to declare your baby’s liquids and separate from the rest of your belongings. I would buy room temperature bottled water once I was through security if I needed it for formula. I pre-measured formula into my clean bottles so they were ready to go minus the water. If the bottle needs to be warmed you can ask the flight attendant for hot water during the flight.

You’re allowed to travel through security with a “reasonable amount” of breastmilk. TSA agents often will ask to open the milk to test it. If you don’t want them opening it, you can ask for “alternate screening procedures” which I think consists of a pat down and bag inspections but I’m not completely sure. I advise carrying the milk in a small lunch bag size bag (I have this one and it works just fine and fits nicely in a diaper bag) with ice packs or frozen grapes as coolers and also bringing empty sandwich bags to fill with ice at the airport or on the plane. In the name of packing lightly: breast milk storage bags make great ice packs. Also remember that frozen milk bags are, in effect, ice packs.

In order to cut down on the number of bottles I packed, I took one trip using Playtex bottles with liners. I only had to pack one bottle, nipples, and liners for each feed. This allowed me to forget about sanitizing bottles.

Navigating the Airport

Some airports have “Mother’s Rooms” where nursing moms can nurse or pump in private. I’ve seen very few nice ones, I’ve seen terrible ones, and more often than not I see that these don’t exist or they’re located too far to walk to before or between flights. The Friendly Airports for Mothers Act was passed in October 2018 and requires all medium-sized and large airports to provide lactation rooms in each terminal and they must be a non-bathroom space. So that’s a step in the right direction. In addition, these awesome pods are gaining support around the country and will hopefully pop up in more places: https://www.mamava.com/ (There’s even an app that allows you to locate a pod in airports around North America).

A Note Re: Cow’s Milk

My husband and I have been surprised by the number of airlines that don’t carry milk on board flights. If you have an older baby or toddler who drinks cow’s milk, it can be tricky to ensure you have milk for your flight. Many of the little marts in airports only carry skim milk (or don’t carry any milk at all), but we’ve had success asking coffee shops (Starbucks, Dunkin’ Donuts, etc.) for cups of whole milk. We carry this type of thermos which keeps the milk cold for more than 12 hours and then we bring along our toddler’s favorite no-spill cups on the plane and pour the milk from the thermos into her cup as needed. We also have these silicone lid covers and straws that allow us to cover any cup (like the plastic ones on the plane) to make them spill proof.

How have you managed flights with your nursing or bottle fed baby or toddler? I’d love to hear more tips!

Pin it for later!
Blog, Travel Tips

HOW TO ENTERTAIN TODDLERS ON FLIGHTS

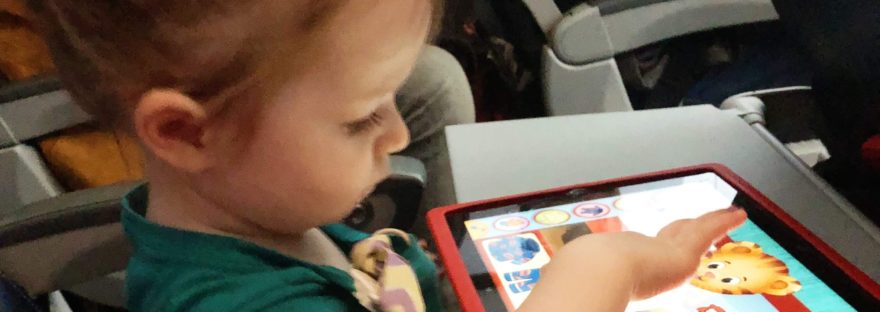
Our 22 month old has taken dozens of trips in her short life, so we’ve had the opportunity to test out many forms of entertainment while in flight. We’ve determined that all you really need to bring is an iPad with Daniel Tiger seasons 1-10 downloaded and ready to go.

The End.

Just Kidding. But do not discount the importance of screen time during travel. We swear by it (…and my husband’s a pediatrician and we limit screen time in our home. When we travel we’re in survival mode and all rules go out the window). Our favorite shows for toddlers are Daniel Tiger’s Neighborhood, Mister Rogers’ Neighborhood, and Sesame Street. It’s even better when kids are not used to screen time so it’s a reaaaaal treat.

As for headphones for small ears: These are great because they are soft and cover the head like a warm headband. Bonus: they make your toddler look like a cute panda or other equally endearing furry animal. If your child rejects all headphones you can always just put the device on a low volume. I’ve said it before and I’ll say it again: other passengers would rather hear your device (at a low volume) than your fussing toddler. Also, the other passengers should (if they’re smart) have noise cancelling headphones with them, anyway, and if they don’t they can ask to borrow some from a flight attendant.

We also like age-appropriate apps. There are lots of apps we like… this will take an additional post.

Beyond screens, we opt for toys and games that a) do not take up precious luggage space, b) we don’t mind getting lost, and c) are not messy.

My mother, who is an expert family traveler in her own right, always packed our carry on backpacks with wrapped toys from the dollar store. My siblings and I looked forward to unwrapping our surprises on the plane and then spending hours playing with our new toys. For toddlers it takes time and focus to do the unwrapping and can (possibly) buy you a few minutes of peace during the flight.

Some of our favorite toys for the plane are:

  • A couple of dollhouse people or figurines that our toddler enjoys playing with at home. (We have duplicates at home in case one gets left behind).
  • Melissa and Doug Water Wows are awesome. Remember those invisible ink books you had as a kid? These are the 21st century version and so much cooler. We fill the small brush with water before getting on the plane in order to prevent a wet mess in flight.
  • Mess-free Crayola materials like Crayola Color Wonder. You can even buy half-size markers (with invisible ink) to fit compactly in backpack.
  • A Matching Game in a small ziploc bag. I print out pictures from the internet, laminate, cut them, and stick in a sandwich bag. Maybe this seems too time/labor intensive, but our toddler loves it.
  • Colorforms.
  • Small board books or magazines. Hidden pictures are especially popular with our toddler and you could even surprise your kid with a new one they’ve never seen. Our favorite magazines are High Five by Highlights and Babybug by Cricket Media.
  • This plastic book is great because you can put in your own family photos and switch them out regularly for new entertainment.
  • Do you know about Lacing Boards? Easy to pack and a total hit with little ones (for those over two years old, I’d say.)
  • Travel-sized Magna Doodle.
  • Sticker books.

Other favorite activities include:

  • Scroll through family photos/videos on the phone.
  • Pretend like you live in the 1800s and do nursery rhymes and tell stories AND ALL OF THOSE GAMES YOUR GRANDPARENTS HAD TO PLAY AS CHILDREN because they didn’t have screens.
  • Bring Cheerios and some string and make a necklace- then eat the Cheerios.
  • FOOD. I cannot stress the merits of snacks enough. Bring cheerios. Bring puffs. Bring all-organic-pre-chopped carrot sticks if that’s more up your alley. Goldfish, Animal Crackers (you can do animal noises, too!), and fruit/veggie pouches (the smaller size to meet liquid regulations) are easy. Just bring food, lots of it, and let your kid munch away in bliss. You know what we pack? Those wafer ice cream cones (minus the ice cream, of course). Toddler loves ‘em. Pick snacks that take forever to eat. Salty snacks like potato chips are also good in that they make your kid thirsty so she’ll drink water to stay hydrated on the plane.
  • Walk the aisles.  
And sometimes they sleep.

Even if you’re not creative at all, try to adopt an inventive spirit and devise games to play in the air. I-Spy. Simon Says. My husband pretended to be the robot Alexa for two hours on a flight back from Iceland. Other passengers were confused but… whatever appeases your kids… Remember that this is a chance to spend quality time with your toddler so try to relish this special time together (ha).

Pin it for later!
Blog, Travel Tips

Top Ten Seventeen Tips for Traveling with a Baby or Toddler

This was supposed to be a Top Ten List but quickly became longer as I thought of more tips. In no particular order…

Our car seat backpacks are purple and grey to easily differentiate between each child’s seat.

1. If you bring a car seat, use it like another free checked bag. We use these car seat travel backpacks and they’ve been a game changer. They cost about $40 and are padded, but you can find less durable, cheaper ones. We only bought these after having our second child and knew we’d be doing a lot of travel over the next few years. Before buying these we always covered our car seat in bubble wrap and then put it in a big garbage bag. And this is key: before bagging the seat fill it with lots of diapers, wipes, and other baby gear, liquids, etc. that you’re not allowed or able to fit in your carry on.

2. TRY to travel as light as possible… although everyone knows traveling with kids means packing a lot of gear, it’s possible to downsize.

  • Borrow a crib or pack n’ play from your hotel/apartment rental. (I’ve never stayed at a hotel that won’t offer a crib, and to my surprise many AirBnBs/apartment rentals can provide a pack n’ play. Just ask).
  • If possible, leave the car seat at home. Rent one or take cabs that provide one (…yes, these exist and yes, they cost a bit more money).
Sinkboss

3. Acquire a SinkBoss (portable sink and drying rack) if your baby/toddler uses bottles or sippy cups. This will be your best friend in hotels. It allows you to wash/sanitize bottles and pacifiers without putting them into the bathroom sink (whose cleanliness is often questionable). Then you can air dry them on its rack and hang it from the shower or towel rails (very helpful when you don’t have much/any counter space in the room). It folds up compactly and can fit nicely at the bottom of a suitcase. $35. www.sinkboss.com

Best place for a nap is the Ergobaby 360. (We love this carrier because baby can face in or out, or go on the back).

4. Use a baby carrier or lightweight umbrella stroller. My favorite carriers are wraps (Boba, Moby, Solly, K’tan, or sling wraps) for little babies and structured carriers (Ergo, BabyBjorn) for older babies. We brought our normal stroller along on one trip and it was nothing but a hassle. Another option is buying a cheap umbrella stroller (oftentimes you can find them at a drugstore for $10-15) at your destination and then donate it before you leave. I’d call around before your trip, though, to ensure a store carries them, especially if you need something within walking distance of your hotel.

5. If your budget allows, get TSA pre-check ($85 for five years) or Global Entry ($100 for five years). Global Entry membership is probably the most significant travel investment we’ve made and it saves a ton of time and hassle at the airport. It does involve a 20-30 minute interview as part of the application process. Note: Children can piggyback on parents’ pre-check service but they need their own Global Entry membership.

6. If you’re traveling with a lot of gear or multiple children, bring a collapsible wagon instead of the stroller. You can check it at the gate just like you would a stroller but it’s able to carry more gear at the airport.

Car seat… baby… drinks… snacks… backpacks… throw it all in a wagon!

7. If you have multiple toddlers/babies pack their clothes in packing cubes and pack the cubes in with your own luggage. Toddler and baby clothes are small so they often don’t take up much room. Bonus: If the cubes are a different color for each kid you can easily pull out a specific kid’s clothes more quickly.

8. Dress your children wisely for the plane. Dress a baby in footie pajamas even if it’s not cold outside. Planes are often chilly for a baby and with footies you don’t have to worry about losing those tiny shoes and socks.

9. Use screen time to the max. This works especially well if you try to curb screen time at home because it’s a real treat for kids to get unlimited screen time on the plane. My toddler only knows that two shows exist: Daniel Tiger’s Neighborhood and Mister Rogers’ Neighborhood. She loves them both and will happily watch them all day if we let her (and spent like 9 hours watching Daniel Tiger on our recent 14 hour flight). Obviously, all kids are different and we just happened to get a toddler who loves these shows. Bring a tablet and make sure it’s charged. Bring an external battery. As for headphones, we’ve used these ones but also have no qualms about setting the volume low and letting her listen out loud. I’m pretty sure fellow passengers would rather listen to “It’s a Wonderful Day in the Neighborhood” than my toddler’s fussing.

Nine hours of Daniel Tiger FTW!

10. Bring lots of snacks. Animal Crackers, Goldfish, Cheez-its and veggie straws are easy along with fruit/veggie pouches. Also consider that salty snacks help kids get thirsty so they’ll drink water on the flight which is important for staying healthy during travel. I try to avoid anything that can melt or get sticky.

11. Carry a two-day supply of everything in the diaper bag because what if your flight is delayed and you’re stranded in the Charlotte airport after stores have closed and you’ve run out of diapers and baby food and a clean change of clothes? Just sayin’.

12. Throw a few garbage bags into your luggage. They have so many uses in a pinch: blackout curtains for hotel room (if they’re black), dirty laundry bag, rain poncho, etc. I’ve also heard that if you line the bottom and top of your suitcase with a garbage bag then the slippery surface keeps your clothes from wrinkling…. I’ve never tried it because frankly I don’t really care about wrinkled clothes. We pack extra smaller ziploc bags, too, for leaky liquids, etc.

13. Count your suitcases, purse, backpacks, diaper bag, car seats, wagon, etc. and keep the number in your head. This is the quickest way to ensure you have all of your stuff when you’re hustling around an airport. (Bigger families may want to conduct a kid count as well. My mom was left behind at a gas station during a family road trip during her childhood. They came back for her, but.. yeesh.)

Find yourself an AirBnB with an awesome clawfoot tub (like this one in Montreal)!

14. At your destination, opt for an apartment instead of a hotel, if that’s a possibility. The popularity of AirBnB has made this much more feasible in the last few years and it’s often a cheaper option than a hotel. An apartment with a fridge and microwave can be a life saver with babies, especially if you’re pumping and storing milk.

15. Make showering with your little one a semi-regular thing if you plan to travel frequently, especially abroad. Chances are you will have to stay somewhere without a bath if you travel internationally. Might as well acclimate kids to the shower early.

Even tiny toddlers can carry their essentials… like stuffed puppy.

16. If kids are old enough, make them carry their own bag/backpack. If you have multiple children, give each kid a different color bag. We have our toddler carry her own small backpack filled with in-flight entertainment, snacks, and her adored stuffed puppy.

17. Try to relax, even if your kid is screaming. It’s likely that you are devastated and doing everything you can to help soothe your child. Nowadays, most everyone has (or can ask a flight attendant for) headphones on the plane to drown out the noise of crying babies. Many people will be understanding, and those who aren’t either don’t have kids or are terrible people so, really, who cares?

We have much more advice when it comes to family travel and will expand on these ideas in subsequent posts. What are your top tips for traveling with kids?

Pin it for later!